Frequently Asked Questions
Scroll to find an answer to your inquiry or email us by completing the form below:

Latest Versions:
1 PainTrace® App Version and Update Steps:
- Logout (in the app click on the power icon on the left hand menu)
- Close PainTrace® App (double click home button and swipe up)
- Wait for the PainTrace® App to update (~1 min)
- Open the PainTrace®App on your iPad
- Login
- Click the "?" at the bottom
- Click on Version
- The version numbers should match the numbers above. If it still does not, complete the steps below
If the PainTrace App has still not updated, please complete the following steps:
- Close the PainTrace App
- Open the Self Service App
- Click Reinstall under the BioTraceApp icon
- Wait for the PainTrace App to finish updating
- Open the PainTrace App
- Click on the "?" at the bottom
- Click on Version
- The version numbers should match the numbers above
If you are still having issues contact Technical Support, techsupport@biotraceit.com or 855.571.1888
2 PainTrace® iPad Software Version and Update Steps: 18.6
Complete the following steps below:
- Before updating, Clear web cache in the PainTrace App:
- Close PainTrace App (double click home button and swipe up).
- Settings > PainTrace > Turn “Clear web cache” toggle ON
- Open PainTrace App.
iPad Software: iOS 18.5
Settings > General > Software Update > Download > Install
If you are still having issues contact Technical Support, techsupport@biotraceit.com or 855.571.1888.
- This update may take > 30 minutes.
- Upon completion, ensure the following:
- Go to Settings > PainTrace
- Ensure Bluetooth, Microphone & Speech Recognition toggles are ON.
- Ensure ALL Siri & Search toggles are ON.
- Go to Settings > General > Keyboard > Enable Dictation
- Ensure the Enable Dictation toggle is ON.
Patient:
1 Why is it so important to clean the skin in the area where the sensors will be placed?
Cleaning the skin thoroughly with isopropanol alcohol and gauze is paramount for success to ensure good sensor to skin contact. Ensure that the hair is cleanly shaved in the species-specific location. Pressure should be applied while cleaning the skin with alcohol to thoroughly remove any oils, debris, dirt, hair, sweat & water on the skin’s surface. Repeat cleaning with a new alcohol pad or gauze until it is visually clean upon final skin wipes. Post cleaning, use sterile medical gauze to assist with drying as a cloth may leave behind debris.
For PainTrace® to interpret the electrical nerve signalling, the metal sensor must be flat against the skin. Oils, debris, dirt, hair, sweat & water must be removed from the skin prior to applying the sensors.
2 Do I need to shave the hair in the species-specific sensor location?
Yes, to ensure good sensor to skin contact cleanly shave all hair before adhering the sensors to the patient. For PainTrace® to interpret the electrical nerve signalling, the metal sensor must be flat against the skin. Oils, debris, dirt, hair, sweat & water must be removed from the skin prior to applying the sensors.
3 Is there a proper way to remove a sensor from the packaging?
Yes, please remove the sensor using the white tap to avoid leaving your fingerprint on the adhesive ring of the sensor. Debris and oils from our fingers may cause the sensor to not ideally adhere to the skin.
4 How do I know I have good sensor to skin contact? (Sensor Calibration)

NOTE: Depending on the species the calibration peaks may not be as distinct. PainTrace® data is being acquired if the location of the sensors is correct, all attachment sites are connected, and the baseline is not collecting linearly around zero (as demonstrated by disconnecting one sensor lead during training). Ensure baseline is stabilized for 30s before starting exam. Only one calibration per set of adhered sensors is necessary. After calibration, you can stop this trace and begin a new trace.
- How to Calibrate:
-
Start trace.
-
Wait ≥ 15 s for data to collect or until baseline is steady (not sloping).
-
Press left sensor firmly for 2s and release 1s; observe negative peak.
-
Press right sensor with same pressure and duration; observe positive peak (optimally same size).
-
Clearly annotate left and right calibration.
-
Collect baseline data for ≥ 1 min or until a steady baseline is reached (not sloping).
-
Ensure Baseline is stabilized for 30s before starting exam.
-
If the above is true then you have good sensor to skin contact.
5 Can I use other types of sensors with the PainTrace® monitoring system?
The PainTrace® Veterinary Sensors are disposable pre-gelled silver/silver chloride biosignal monitoring electrodes. The only sensors specifically designed for use with PainTrace® to effectively acquire pain biosignals.
6 What should I do if my patient has loose skin in the sensor placement site?
- Adjust the PainTrace® wearable so the device is centred at the back of the neck.
- Position the leads along the sides of the body towards the center of the back / neck depending on the wearable used.
- Secure excess cable leads under the Velcro straps. Avoid bunching, bending or coiling.
- Completing this will reduce the following:
- Weight of sensor cable causing excess skin to hang down away from body.
- Excess sensor cable annoying the animal.
- Completing this will reduce the following:
To further secure the sensors, sensor cable, and device to the animal, 3" Vet Wrap for shorter wear and 3" Elastikon for longer wear has been recommended.
- Place over sensors & sensor leads.
- Apply even pressure during wrapping and ensure all creases are removed.
- Firmly wrap twice around the body. Ensure the cable leads are not bunched or coiled under the wrap as this may damage the cable or irritate the patient.
PainTrace® Device:
1 How do I turn the PainTrace® device on?
-
LED will glow pink/blue during press
-
LED will pulse green once upon release (and then go out to conserve battery life).
2 What is the blue button for on the PainTrace® device?
3 Why won't my PainTrace® device connect to Bluetooth?
4 How long does it take for the PainTrace® device to charge?
The device is fully charged in 3 hours and can hold charge for continuous use of up to 3 days.
5 Can I charge the PainTrace® device while it is in use?
Safety Warning: The PainTrace® device is not operational when charging. Do not attach the PainTrace® cable to sensors when charging.
6 Is the PainTrace® device waterproof?
No, the device is only water resistant. Do not use outside during heavy precipitation. Do not submerge in water.
7 Does it matter which side of the patient the cable leads are attached to?
Yes, the RED lead attached to the RIGHT side.
8 How do I tell if my device is charging?
-
Turn device on.
-
Plug charging cable into device.
-
LED should continuously turn a green / orange color while charging. If it doesn't, then the device is not charging and you should contact Technical Support, techsupport@biotraceit.com or 855.571.1888.
Note: When the device is fully charged, the LED will continuously turn green.
PainTrace® App:
1 Why is the PainTrace® App not loading? / Why is my PainTrace® not starting?
Ensure the following:
-
WiFi is enabled and connected.
-
Bluetooth is enabled.
- The PainTrace® App and PainTrace® iPad iOS are the latest version.
- Patient and Device were selected from the drop down menus (only for PainTrace® Not Starting)
If all the above are true and the PainTrace® App is still not functioning as expected, complete the following in the order below:
- Close the app. (double click the PainTrace® iPad’s home button and swipe up on the app tile)
- Go to Settings > PainTrace and toggle "Clear web cache" ON.
- Open PainTrace App.
- Reopen the app and retry using the PainTrace® App.
- Close the app. (double click the PainTrace® iPad’s home button and swipe up on the app tile)
- Turn the PainTrace® iPad off. (Hold in the Power Button at the top right of the PainTrace® iPad; slide to power off.)
- Turn the PainTrace® iPad on. (Hold in the Power Button.)
- Ensure WiFi is enabled and connected.
- Ensure Bluetooth is enabled.
- Open app and retry using the PainTrace® App.
- If you are still having issues contact Technical Support, techsupport@biotraceit.com or 855.571.1888
2 Why is the PainTrace® App not functioning as expected?
Ensure the following:
-
WiFi is enabled and connected.
-
Bluetooth is enabled.
- The PainTrace® App and PainTrace® iPad iOS are the latest version.
- Patient and Device were selected from the drop down menus (only for PainTrace® Not Starting)
If all the above are true and the PainTrace® App is still not functioning as expected, complete the following in the order below:
- Close the app. (double click the PainTrace® iPad’s home button and swipe up on the app tile)
- Go to Settings > PainTrace and toggle "Clear web cache" ON.
- Open PainTrace App.
- Reopen the app and retry using the PainTrace® App.
- Close the app. (double click the PainTrace® iPad’s home button and swipe up on the app tile)
- Turn the PainTrace® iPad off. (Hold in the Power Button at the top right of the PainTrace® iPad; slide to power off.)
- Turn the PainTrace® iPad on. (Hold in the Power Button.)
- Ensure WiFi is enabled and connected.
- Ensure Bluetooth is enabled.
- Open app and retry using the PainTrace® App.
- If you are still having issues contact Technical Support, techsupport@biotraceit.com or 855.571.1888
3 How many devices can one PainTrace® iPad support?
Currently, 1 PainTrace® device can be connected to 1 PainTrace® iPad, but updates to the PainTrace® App are coming soon to provide for up to 4 PainTrace® devices to be connected to 1 PainTrace® iPad.
4 How do I view my traces in the browser? / Why can’t I find my traces in the browser?
Navigate to dash.biotraceit.com and use the same login information as the PainTrace® App on your PainTrace® iPad. Before using the website, ensure you have cleared your cache and cookies.
In Chrome:
Keyboard Shortcut (pressed simultaneously) Ctrl + Shift + Delete
OR Steps: On your computer, open Chrome. At the top right, click 3 dots. Click More tools. Clear browsing data. At the top, choose a time range. To delete everything, select All time. Next to "Cookies and other site data" and "Cached images and files," check the boxes. Click Clear data.
Firefox:
Keyboard Shortcut (pressed simultaneously) à Ctrl + Shift + Delete
OR Steps: Click the menu button. and select Options. Select the Privacy & Security panel. In the Cookies and Site Data section, click Clear Data. Ensure both the Cookies and Site Data and Cached Web Content are check marked, click the Clear button. Close the about:preferences page. Any changes you have made will automatically be saved.
Safari: (Mac users only)
Keyboard Shortcut (pressed simultaneously) Opt + ⌘ Cmd + E
OR Steps: Click on the Safari drop-down menu and select Preferences. Click the Advanced tab. Select the Show Develop menu in menu bar checkbox and close the Preferences window. Select the Develop drop-down menu. Click Empty Cache. Clear browser history.
5 Why is there an error message stating "Trace already running" when the device is not in use?
Device is accessible:
- Turn PainTrace® device off
- Logout of PainTrace® App
- Close PainTrace® App
- Turn Bluetooth off - PainTrace® iPad
- Turn Bluetooth back on - PainTrace® iPad
- Open PainTrace® App:
- Login
- Open Trace page
- Click New Trace button
- Select Patient
- Turn PainTrace® device on
- Select Device
- Click Start Trace
Device is not accessible:
- Close the PainTrace App (double click home button and swipe up)
- Click on the Devices icon on the left-hand side menu
- Click on the drop-down menu and choose the correct device
- Click on the next drop-down menu and choose Stop.
- Click Run
- Once device is stopped, the message will read Stop Completed
- If you are still having issues contact Technical Support, techsupport@biotraceit.com or 855.571.1888
6 What are the zooming features available in the PainTrace® App?
Touch and Drag: with one finger touch the graph either above or below the data and drag your finger horizontally to the right to zoom in. Double tap to revert back to Full view window.
Note: Ensure you are in Full View mode during a live trace.

A. Zoom Mode - turns the Pan mode off and returns graph to zoom mode.
B. Autoscale - returns graph to full view
C. Pan mode - use this to navigate through the trace when you are zoomed in.
Adjusting the scale on the iPad for viewing data
To adjust the scale on the Y-Axis labelled “Value”, you have two options:
- Input values for Y Min and Y Max above the PainTrace graph, then click the blue arrow to the right of these values. The Y Axis will adjust based on the inputted values.
OR
- On the Y-Axis labelled “Value”, drag your finger up or down from the top or bottom edge of the graph, as shown in the image below. This allows you to increase or decrease the scale of the Y-Axis.

Once you have adjusted the Y-Axis, you can use the pan feature to navigate through the trace once zoomed in and within the specified Y-Axis scale.
To adjust the X-Axis labelled “Time”, drag your finger to the left or right from the bottom edges of the graph, as shown in the image below. This allows you to adjust the timeframe visualized on the PainTrace graph.

7 Why is Speech to Text not functioning properly?
- Close the PainTrace® App. (Double click home button and swipe up)
- Ensure you have the latest version for the PainTrace® App & PainTrace® iPad Software. Refer to the top of the FAQ page.
- Go to Settings > PainTrace®
- Ensure Bluetooth, Microphone & Speech Recognition toggles are ON.
- Ensure ALL Siri & Search toggles are ON.
- Go to Settings > General > Keyboard > Enable Dictation
- Ensure the Enable Dictation toggle is ON
- Open PainTrace® App and start a PainTrace® . Try speech to text to see if it is working.
- If you are still having issues contact Technical Support, techsupport@biotraceit.com or 855.571.1888
8 How do I resolve button overlay with trace data? (Tap to Text not working)
-
Tap the drop down field at the upper right corner of the graph.
-
Select Full trace view.
-
Click the Pan Icon (the axes with arrows).
-
Tap and drag graph to the left. This will allow access to the most recent point for tap to text annotation.
PainTrace® Biosignal:
1 How does the PainTrace® device interpret and quantify pain?
PainTrace® is a pain biosignal that in conjunction with veterinary, or healthcare diagnosis, aids in the identification and measurement of pain. The PainTrace® device is able to interpret the electrical signals produced by nerves through the afferent and efferent pathways, transmit this data via Bluetooth and quantify pain level in real-time graph format of PainTrace® VS Time.
2 Why is my sensor calibration abnormal?
Depending on the species the calibration peaks may not be as distinct. The key is to monitor baseline collection of data. PainTrace data is being collected, if the following is true:
- Location of sensors is correct.
- All attachment sites are connected (Sensor Cable to Device, Lead to Sensor, and Sensor to Skin).
- The baseline is not collecting linearly around zero (as demonstrated by disconnecting one sensor lead during training).
- Ensure baseline is stabilized (not sloping) for 30s before starting exam.
NOTE: Sometimes a baseline may fluctuate and have a slight incline or decline, if this is the case proceed with your PainTrace and exam.

3 When I complete the sensor calibration, why are there no peaks observed when the sensors are pressed?
Depending on the species the calibration peaks may not be as distinct. The key is to monitor baseline collection of data. PainTrace data is being collected, if the following is true:
- Location of sensors is correct.
- All attachment sites are connected (Sensor Cable to Device, Lead to Sensor, and Sensor to Skin).
- The baseline is not collecting linearly around zero (as demonstrated by disconnecting one sensor lead during training).
- Ensure baseline is stabilized (not sloping) for 30s before starting exam.
NOTE: Sometimes a baseline may fluctuate and have a slight incline or decline, if this is the case proceed with your PainTrace and exam.
4 What do changes in the PainTrace baseline mean?
- Baseline trending of data is associated with chronic pain.
- Positive baseline is related to an absence of chronic pain.
- Negative baseline is related to chronic pain. A more negative baseline is associated with increase in chronic pain.
- An increasing baseline may be related to good health, excitement, or anxiety.
- Decreasing baseline denotes an increase in chronic pain.
5 What does a negative peak mean?
Negative PainTrace® peaks are associated with acute pain, the larger and sharper the more acutely painful the experience.
Types:
-
- Intense, sharp, shooting pain = high frequency / narrow negative peak.
- Dull, sustained pain = low frequency / lower slope /broader negative change of the baseline.
6 Why are the PainTrace® pain peaks positive as opposed to negative?
Ensure that the red lead is attached to the right hand side of the patient and the left lead to the left hand side of the patient. If this is true, and you are still noticing positive peaks, it may be due to the following:
-
A positive peak may reflect the patient’s feelings of anticipation, excitement or anxiety. From research we have noticed a correlation between positive peaks during activities that may cause a patient to be anxious or excited or be anticipating pain when performing the activity. If the patient is used to the action causing pain when not on drugs, this is where positive peaks may be related to anticipation / anxiety.
-
Because drugs have an effect on the pain a patient feels, this may affect the PainTrace® signal.
Drugs that are used to alleviate pain may reduce or eliminate the pain experienced by the patient and therefore reduce or eliminate the pain peak observed during the PainTrace®.
Neuropathic drugs may cause an inversion of the pain signals. Negative pain peaks may be observed as positive. Because PainTrace® reads the afferent and efferent neurosignals in the body, drugs that affect the patient neuropathically will also have an affect on the signal. Through research we have observed this occurring when a patient is on Gabapentin.
Also, NMDA antagonist drugs (ketamine & amantadine) are known for blocking the NMDA receptor which is responsible for the transfer of electrical signals between neurons in the brain.
7 Why is the baseline on my trace collecting linearly around y=0 / Why does my PainTrace data look abnormal?
Flat Line Example:

This may be due to attachment of the sensor cable to the device and / or leads to sensors. Please see the options below and their corresponding steps:
-
The sensor cable was not clicked into place to the connector on the device:
-
Stop trace.
-
Click sensor cable into place.
-
Start new trace.
-
-
The lead(s) were not attached to the sensor(s) on the patient’s skin.
-
Stop trace.
-
Attach lead(s) to the correct sensor. Ensure there is metal on metal contact. RED lead attaches to the right sensor.
-
Start new trace.
-
-
The sensors are not securely adhered to the patient’s skin and / or there is a pocket created by hair, sweat, water, or air.
-
Stop trace.
-
Ensure that the hair is cleanly shaved in the species specific location.
-
Clean thoroughly.
-
Pressure should be applied while cleaning the skin with alcohol to thoroughly remove any oils, debris, dirt, hair, sweat & water must be removed from the skin prior to applying the sensors.
-
Repeat cleaning with a new alcohol pad or gauze until it is visually clean upon final skin wipes.
-
Ensure the skin is dry and not wet from water or sweat before adhering the sensors. Use sterile medical gauze to assist with drying as cloth may leave debris.
-
-
Place new sensors on completely shaven, clean, dry skin.
-
Ensure the adhesive ring has good contact.
-
Press firmly on the metal sensor.
-
-
Ensure sensors are flat against the skin and skin is flat to the body. If the sensors are lifting due to sweat or weather conditions, try the following solution:
SkinTac:
-
Use the peg to cover the area of skin where the metal sensor will be placed.
-
Carefully apply one thin layer to the shaved area of skin around the peg.
-
Hold peg in place until the SkinTac is dry, 15 – 30s, it will be tacky to the touch.
-
- Start new trace.
-
8 Why is the baseline not stabilizing and sloping up or sloping down?
Sometimes the PainTrace® value starts more negative or positive than the steady state PainTrace® baseline noted as the physiologic baseline. If the baseline is noted to never stabilize and instead slopes up or down, this suggests the sensors are polarized. The sensor calibration peaks will also appear abnormal as described below.
Sensors become polarized due to the interaction of free electrons on the skin’s surface which can impact the PainTrace® signal. If sensors appear to be polarized, this should be resolved before starting the exam.
We advise the following:
NOTE: Do not press too firmly and overshoot the baseline too far. A stable baseline indicates the physiologic baseline has been reached.)
Left if Low – pressing the left sensor will drive baseline down.
-
- Sloping up:
- Press the right sensor sharply, the baseline will increase.
- Wait to see if the baseline becomes stable.
- If the baseline continues to increase, repeat 1) to 2)… this speeds up escalation to a more positive baseline equilibrium.
- Sloping up:
-
- Sloping down:
- Press the left sensor sharply, the baseline will decrease.
- Wait to see if the baseline becomes stable.
- If the baseline continues to decrease, repeat 1) to 2)… this speeds up escalation to a more negative baseline equilibrium.
- Sloping down:
If the physiologic baseline is not reached complete the following:
-
- Stop the PainTrace®.
- Unclip / unsnap sensor leads.
- Remove and dispose of sensors.
- Re-clean skin with alcohol and allow to dry.
- Apply new sensors.
- Reconnect leads, RED is right.
- Start a new PainTrace®.
9 Does the hydration status of the animal influence the PainTrace signal?
Based on our research, when IV fluids are administered this has not been detected to have any influence on the signal.
NOTE: If there was an extreme change in fluids that might induce nausea or discomfort it is likely PainTrace would be influenced in this case.
Administration:
1 How do I add a member of my staff as a User to the PainTrace® App?
-
On the menu bar, click on the admin icon.
-
Click on users.
-
In the top right corner, click on the add user icon.
-
In the Add New User window, complete all mandatory fields. Check the Admin User box if necessary and select all applicable user permissions.
-
Admin User – User can change permissions for any user including themselves.
-
Create – User can create a new record (user, organization, department, patient).
-
Read – User can only read all data.
-
Write – User can update an existing record (user, organization, department, patient).
2 Can I allow a User to see PainTrace® data from only certain patients?
By creating a Department within the Admin Panel, and assigning patients and users to specific Departments, only users with access to those Departments will have access to the data for those patients.
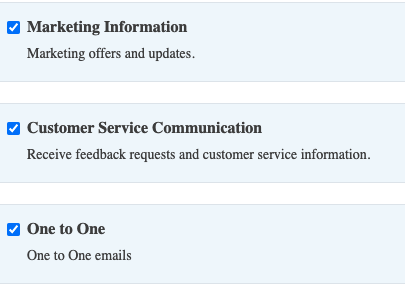
3 How do I resubscribe to Tech Support emails?
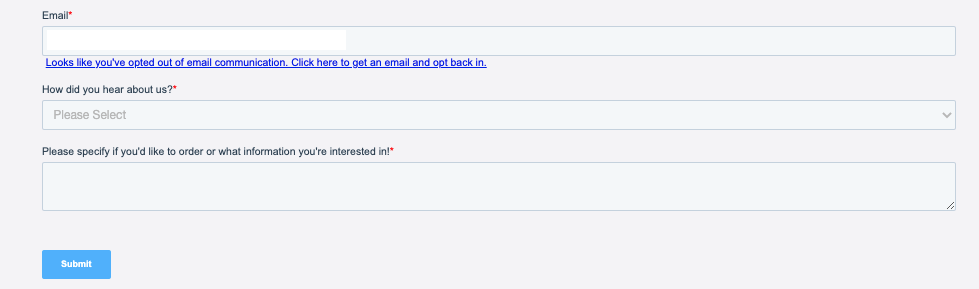

-
- Marketing Information
- Customer Service Communication
- One to One


PainTrace® iPad:
1 How do I exit out of an app?
Double click the home button, swipe up on the tile associated with the app you want to close / exit.
2 Can I log into my iCloud Account?
Please do not log into your iCloud account on the PainTrace® iPad.
3 Can I enable passcode on the PainTrace® iPad?
Please do not enable passcode on the PainTrace® iPad as this will conflict with our PainTrace® iPad Management services.
4 How do I take a screenshot?
Simultaneously press the power button and home button of the PainTrace® iPad.
These photos can be located in the PDF Expert App.
5 How do I access a screenshot?
All screenshots can be found in the PDF Expert app.
- Click on My Files
- Click on Photo Albums
- Click on Recents
- Select photo of interest to view
6 How do I add keychain passwords?
AirDrop feature does not work on the PainTrace® iPad.
On personal Apple device:
- Settings > Passwords
- Click on password of interest
- Username & Password will be displayed
On PainTrace® iPad:
- Settings > Passwords
- Click the + in the top right hand corner
- Add in password information
- Click done